 Skip to content
![]()

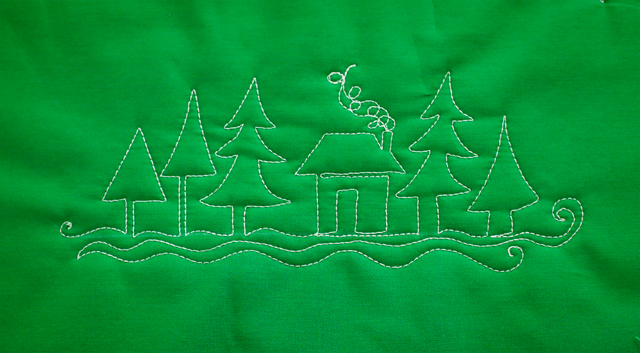
Add the charming and quick winter scene, The Cabins in the Woods motif to your next border and you’ll be snuggled up in your gorgeous handiwork in no time at all! This motif looks more complicated than it is—just three simple motifs combined together in one whimsical border!
Set up your machine for machine quilting by lowering the feed dogs and attaching either your BERNINA Stitch Regulator or a free-motion quilting foot. My favorite is the BERNINA Free-motion embroidery foot #24 foot because it has an open toe and it is offset and provides the greatest visibility. For more on machine set-up visit Twelve Steps to Free-motion Quilting here on WeAllSew.
This pattern works really well as an edge-to-edge motif if you are stitching on the fabulous BERNINA Q24 long arm machine, and it is perfect for sewing on any of the domestic machines like the BERNINA 770QE I use every day.
Thread your machine with a heavy weight thread, 50 wt or heavier to create motifs that really show and stitch a small test sample to check the tension. The BERNINA 770QE is known for its beautiful stitch and adaptive thread tension, however I like my machine quilting stitches a little loose, so I usually lower the top tension slightly. To my eye, the thread and stitches look nicer when the top thread is slightly loosened. Experiment with your machine to be sure you are getting the nicest top and bobbin stitch while machine quilting.
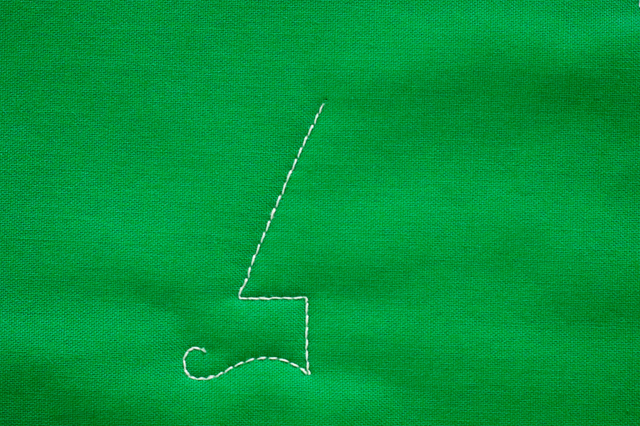
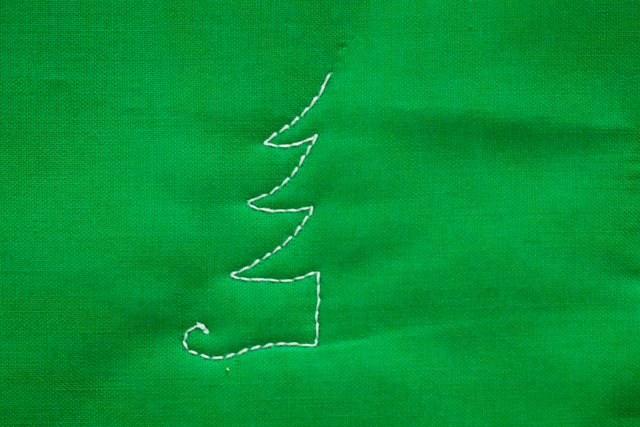
Begin stitching on the lower edge of the quilt border. Stitch along the border for a few stitches, then stitch a short, straight line perpendicular to the border. Stitch several stitches to the left and then stitch at an angle up and to the right.
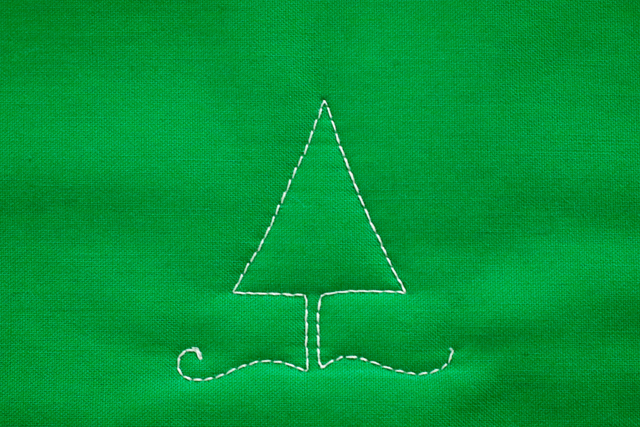
Stitch the mirror image of the first half of the tree, then stitch along the bottom to begin the next tree.
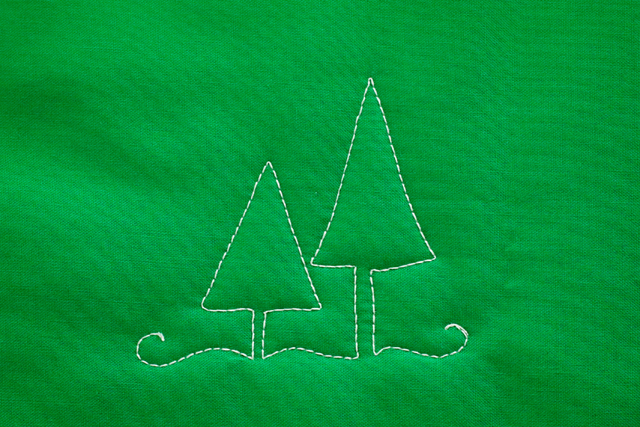
Stitch different height trees to create a more interesting border and be sure to keep the trees nestled together closely for a cohesive design.
Vary the trees by adding an evergreen. Stitch the trunk of the tree and add six or more shallow scallops.
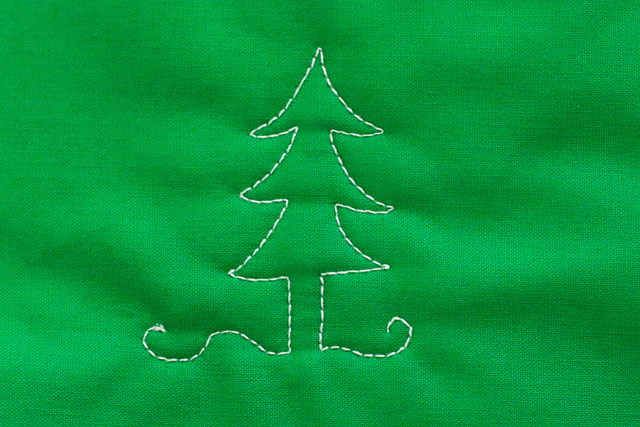
Mirror image the stitching on the first side to complete the tree ending on the baseline.
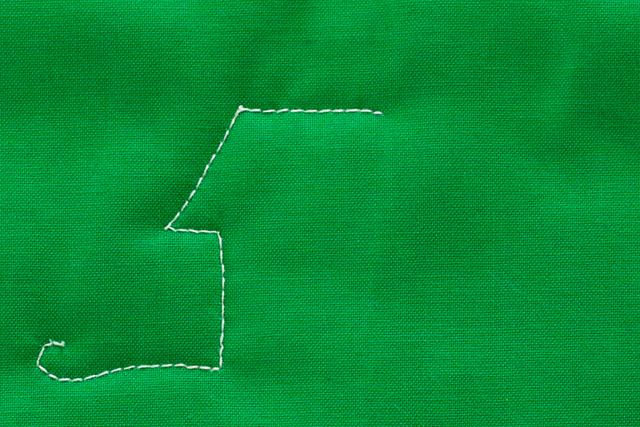
To stitch a small cabin, stitch a vertical line, and jog to the left 3-4 stitches. Add an angled line and a horizontal roof.
Stitch the right side of the roof and stitch from left to right and back again.
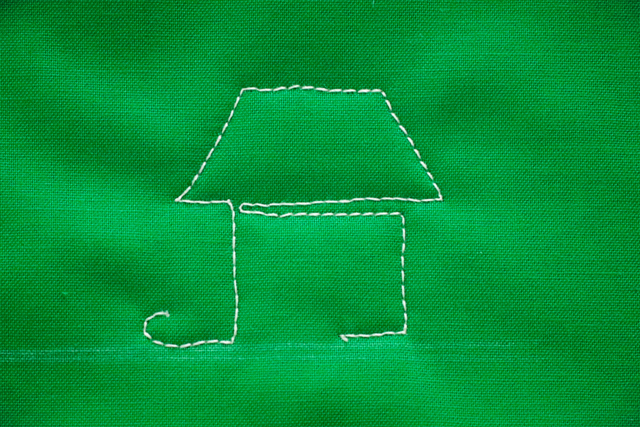
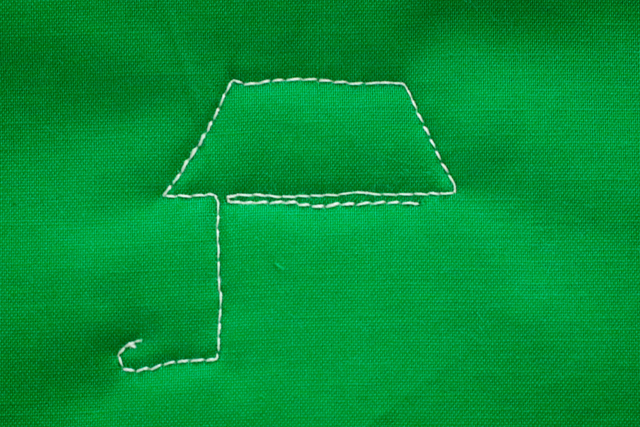
Stitch down to the baseline and then to the left several stitches.
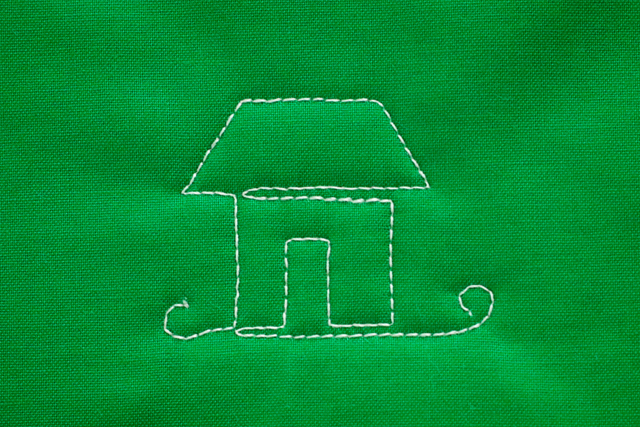
Stitch into the house shape to create a rectangle door; then stitch to the left to close the house shape. Stitch under the entire motif from left to right to begin the next motif in the pattern.
Doodle the motif on paper several times to develop muscle memory for machine quilting before stitching on your quilt border.
Once you start quiting you won’t want to stop….
Try the Cabin in the Woods on kitchen towels, aprons, or a tablerunner.
For more than 100 machine quilting motifs like Cabin in the Woods, be sure to visit me at The Inbox Jaunt where I blog daily from my little cabin in the Minnesota woods!
Lori