Skip to content
June Tailor Quilt As You Go Sew By Number Tree Skirt

It seems like every year I want to change up my Christmas tree colors, which means I am always on the lookout for the right tree skirt to compliment the design. However, there are usually limited in basic colors at the stores to purchase, so I’m left trying to come up with some fabric that catches my eye and that I can make myself. This year, the problem of not finding a tree skirt I love was solved.
Let me introduce you to the Quilt As You Go Tree Skirt by June Tailor, Inc. This super easy and very quick pattern even has a sew by number pattern printed on the batting. It really doesn’t get any easier than that. If you’ve considered trying out a quilt as you go pattern, this is a great place to start for a beginner. It’s also a fabulous option for all the advanced quilters who just want a quick pattern to change up their own Christmas tree, or to maybe gift to a friend or family member.

So, here’s what I absolutely loved about this pattern, the batting is in the bag, already pre-numbered, and ready to guide you right along. The Template for cutting out your fabrics is in the package too and is a great plastic reusable template that I can being used for other designs as well. What’s also great is that you can easily use up extra fabrics from your stash that you’ve been holding onto as well. It only calls for ½ yard each of 4-6 fabrics, so dig into the stash and make your tree skirt extra scrappy!
For my project the fabric line I went with is the “Christmas at Buttermilk Acres” by Riley Blake. If you’ve seen my previous designs, you will see a trend here in styles that I like. The muted grey, cream, red and green in the fabrics are exactly what I love, so I was very excited when I had the chance to see the lines in person. There’s so many fabrics in this line to chose from so it’s tough to narrow it down to just the 4-6 recommended pieces.
To begin any project, I prefer to press and starch all my fabrics ahead of time. That way I can make sure that when it’s time to cut, especially considering for this project I’m using a template, that I can avoid all wrinkles that could otherwise cause a misshapen issue with a cut. After reviewing the pattern and the template, I made the decision to bring out my Sewline marking pen and draw around the template onto the fabric to mark lines for easier quilting.

I could have easily used my rotary cutter to cut down the side of the template with a ruler, but I didn’t want to take a chance of possible nicking the template which could cause an issue down the line. So, for myself, I chose to draw off the template, flip it the opposite direction, and draw that way as well. Since my fabric was doubled over, it allowed me to get 4 even wedges of each fabric quickly and efficiently.

I did use my rotary cutter and ruler to make the cuts once the lines were drawn in order to keep each piece straight and consistent. Next step was to spray baste the batting to the backing, making sure the backing was very smooth, then onto the sewing. It really is that fast and easy!
Once the fabrics were all cut, it just came down to starting to stitch everything in place. I once again used a ¼’ seam as recommended. For this project I used a professional style foot on my machine that allowed it to easily feed over the fabric layers and batting. Per the directions I laid #1 in place, aligned all the edges, and got to work stitching, pining, and pressing. I chose to press after each section was stitched down in order to have a nice clean seam edge before I moved onto the next piece in line. The hardest part was deciding which piece of fabric went in the rotation next!


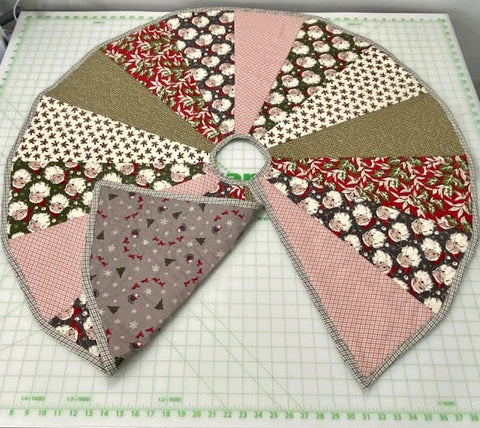
When I came around to piece #16 and #1 meeting, I made the decision to stitch them one on top of the other. The reason behind this is that both then would be secured with the batting and backing on each of them, plus since I’d need to cut down the line anyway, it would be easier to go with this method than to battle fabric that was unsecured. Once all 16 pieces were squared away, It was time to trim up the quilt. I chose to go ahead and stitch down around my smaller inside circle, and larger outside circle in order to secure all fabrics in place prior to trimming away the excess batting and backing. I completed this by stitching a close stitch very close to the fabric unit’s edges, right as it meets the batting and backing. Finally, I cut away all the excess batting and fabric, cut a line right between units 16 and 1, and got ready for the binding.


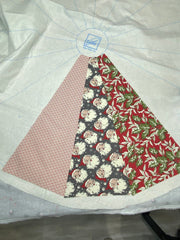
Now for myself, I traditionally cut my binding in standard 2 ½ strips. Cutting them on the bias is not normal for me at all, but this project called for it, especially since it’s curved, and I had to step back a moment and remember how to do that. Thankfully there is a search engine and a video to help us through almost everything these days. A few minutes later and I was right on my way cutting my strips on the bias at 2 ½” width, stitching them together and turning it all into a double fold bias tape ready to go right onto my quilt.

Keeping with the professional foot on my machine, I found making the curves around the edges to be quite easy with the bias binding. Having it already set in a double fold make the process of stitching it on a breeze. I did find I had the best luck with pre-pinning it onto the tree skirt and taking my time to make sure that the layers were straight and smooth. The bias-cut binding does make it much easier to work around the curves and was worth spending the extra research and preparation time getting it right.

I was very pleased with the final product with the tree skirt was complete. The fabric choices are perfect for my tree, the design was simple and fast, and I now have a new option for holiday decorations. Overall, I was very happy with how easy this project is and is perfect for anyone who is ready to change out their holiday décor. This skirt will definitely end up under my tree to hold presents this year.